Extracting Files
As the downloaded resources are in .zip files they will have to be extracted. To do this:
You should now have 3 folders called 'Mms','Sms' and 'Location'. If these files are in your 'Downloads' directory, you may want to move them from there to a new folder in your 'Data' or main dirctory.
For the purposes of this tutorial I will be using SpringSourceToolSuite which is Free to download. You can also use similar applications such as: Eclipse
Setting Up Workspace
When you start up Spring you will be asked to select a workspace. You can click 'Browse' to choose an existing workspace OR create a new workspace (by creating a new folder and selecting it). Do this now.
Once you have selected a workspace and clicked 'OK' you will see the HomeScreen for Spring. Close this.
Now you will see the a screen. The 'Package Explorer' should be down the left hand side of the screen. If it is not, you can display it be going: >Window >Show View>Package Explorer or alternatively [Shift+Alt+Q P].
Importing the Sample Apps
As the downloaded resources are in .zip files they will have to be extracted. To do this:
- Navigate to where the files were downloaded
- Right click on the file
- Choose 'Extract Here'
You should now have 3 folders called 'Mms','Sms' and 'Location'. If these files are in your 'Downloads' directory, you may want to move them from there to a new folder in your 'Data' or main dirctory.
For the purposes of this tutorial I will be using SpringSourceToolSuite which is Free to download. You can also use similar applications such as: Eclipse
Setting Up Workspace
When you start up Spring you will be asked to select a workspace. You can click 'Browse' to choose an existing workspace OR create a new workspace (by creating a new folder and selecting it). Do this now.
Once you have selected a workspace and clicked 'OK' you will see the HomeScreen for Spring. Close this.
Now you will see the a screen. The 'Package Explorer' should be down the left hand side of the screen. If it is not, you can display it be going: >Window >Show View>Package Explorer or alternatively [Shift+Alt+Q P].
Importing the Sample Apps
- Right click on the 'Package Explorer' pane and select >New>Java Project
- Name your project something along the lines of 'com.mycompany.aepona.samples' will do nicely.
- Click 'Finish'
- Right click on your new project and select 'Import'
- Choose 'General > File System'
- Click 'Browse' and navigate to where you saved the files we extracted earlier.
- Choose one of the files. Lets start with the 'Sms' file first. Click 'OK'
- Tick the little check-box beside the file name.
- Click 'Finish'

Current Folder Structure
We have to amend this to get our sample app to work. To get the structure right follow these steps:
Your new structure should look like this:
- Drag the SmsRestExamples.java up the the 'src' file below the project name.
- There will be a little red 'x' beside the file, we will fix this later.
- Drag the folder 'lib' on top of the project name folder (this will get it inline with the project.
Your new structure should look like this:

New Folder Structure
Now we want to deal with that annoying little red 'x'. Double click on SmsRestExamples.java to open it for code viewing. Expand the imports...as you can see this is where the errors are coming from. We will have to import these libraries. To do this just copy and paste the first few lines of the error into google (ie. org.apache.geronimo.mail jar download). One of the best links I have found is the http://www.java2s.com links, if there is one of these available, use it. Download all the necessary jars and unzip them. Once extracted, open the folder and simply drag the .jar file across and drop it into the 'lib' file. repeat this for all of the downloaded jars. Once they have been dropped into the 'lib' file we can right click on the individual jars and select >Build Path >Add to Build Path. The jars that I imported are:
- jackson-all-1.6.1.jar
- geronimo-javamail_1.4_spec.jar
- javax.servlet.jar
- org.eclipse.jetty.http.jar
- org.eclipse.jetty.server.jar
- org.eclipse.jetty.util.jar
- org.eclipse.jetty.io.jar
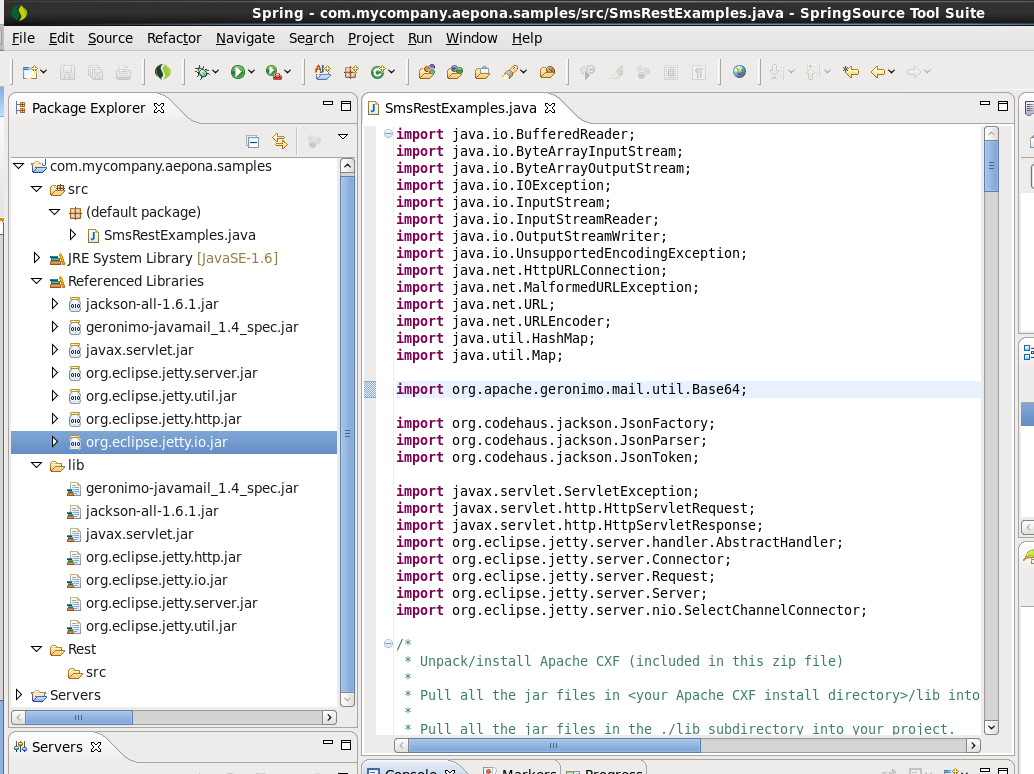
Structure and display after imports
Now that the annoying little red 'x' has gone we can continue actually using the software! Yay! To get the code actually working we can follow the instructions provided with the sample app (this should be just below the imports) - but here it is again anyway:
/* Change the Service Endpoints (URLs) in the following code to point to your provisioned endpoints.
*
* Change the notificationCallbackUrl to the externally visible name and port of your server.
*
* Change the username and password to match those which have been provisioned for you.
*
* Build and run the following code as a Java application...
*/
final static String password = "your_password";
Now try running the sample app as a Java Application. Your output to the console should look something like this:
/* Change the Service Endpoints (URLs) in the following code to point to your provisioned endpoints.
*
* Change the notificationCallbackUrl to the externally visible name and port of your server.
*
* Change the username and password to match those which have been provisioned for you.
*
* Build and run the following code as a Java application...
*/
- Change the sendEndpoint. Login to developer zone to get your endpoints. If you hover over 'MyDevPortal' then click 'Service Endpoints' you will see a list of endpoints. You can see that these are not all that different from those in the sample apps...you should only have to copy across the 'https://developer.aepona.com/' part of the endpoint.
- Change username and password. These should be the same as those you used to login to developer zone. Find the code:
final static String password = "your_password";
Now try running the sample app as a Java Application. Your output to the console should look something like this:
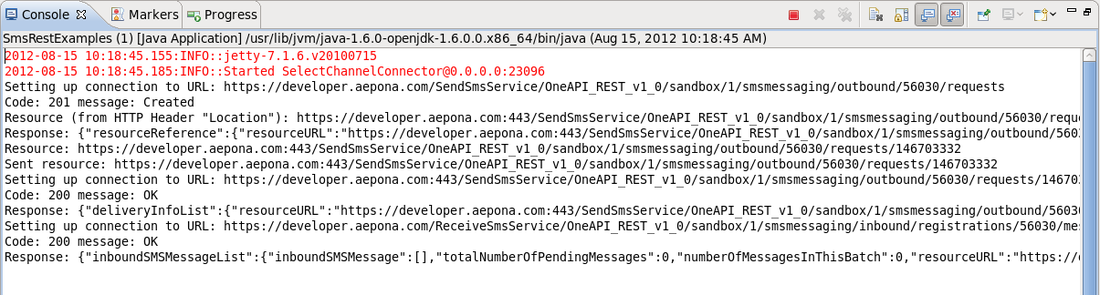
Output from the console
The process should be very similar for both the MMS and Terminal Location Sample Apps.
I hope this has been of some help to you.
Happy Coding...
Rhee
I hope this has been of some help to you.
Happy Coding...
Rhee
 RSS Feed